-
-
-
Category
-
Semiconductors
- Diodes
- Thyristors
-
Electro-insulated Modules
- Electro-insulated Modules | VISHAY (IR)
- Electro-insulated Modules | INFINEON (EUPEC)
- Electro-insulated Modules | Semikron
- Electro-insulated Modules | POWEREX
- Electro-insulated Modules | IXYS
- Electro-insulated Modules | POSEICO
- Electro-insulated Modules | ABB
- Electro-insulated Modules | TECHSEM
- Go to the subcategory
- Bridge Rectifiers
-
Transistors
- Transistors | GeneSiC
- SiC MOSFET Modules | Mitsubishi
- SiC MOSFET Modules | STARPOWER
- Module SiC MOSFET ABB’s
- IGBT Modules | MITSUBISHI
- Transistor Modules | MITSUBISHI
- MOSFET Modules | MITSUBISHI
- Transistor Modules | ABB
- IGBT Modules | POWEREX
- IGBT Modules | INFINEON (EUPEC)
- Silicon Carbide (SiC) semiconductor elements
- Go to the subcategory
- Gate Drivers
- Power Blocks
- Go to the subcategory
- Electrical Transducers
-
Passive components (capacitors, resistors, fuses, filters)
- Resistors
-
Fuses
- Miniature Fuses for electronic circuits - ABC & AGC Series
- Tubular Fast-acting Fuses
- Time-delay Fuse Links with GL/GG & AM characteristics
- Ultrafast Fuse Links
- Fast-acting Fuses (British & American standard)
- Fast-acting Fuses (European standard)
- Traction Fuses
- High-voltage Fuse Links
- Go to the subcategory
- Capacitors
- EMI Filters
- Supercapacitors
- Power surge protection
- TEMPEST emission revealing filters
- Surge arrester
- Go to the subcategory
-
Relays and Contactors
- Relays and Contactors - Theory
- 3-Phase AC Semiconductor Relays
- DC Semiconductor Relays
- Controllers, Control Systems and Accessories
- Soft Starters and Reversible Relays
- Electromechanical Relays
- Contactors
- Rotary Switches
-
Single-Phase AC Semiconductor Relays
- AC ONE PHASE RELAYS 1 series| D2425 | D2450
- One phase semiconductor AC relays CWA and CWD series
- One phase semiconductor AC relays CMRA and CMRD series
- One phase semiconductor AC relays - PS series
- Double and quadruple semiconductor AC relays - D24 D, TD24 Q, H12D48 D series
- One phase semiconductor relays - gn series
- Ckr series single phase solid state relays
- One phase AC semiconductor relays for DIN bus - ERDA I ERAA series
- 150A AC single phase relays
- Rail Mountable Solid State Relays With Integrated Heat Sink - ENDA, ERDA1 / ERAA1 series
- Go to the subcategory
- Single-Phase AC Semiconductor Relays for PCBs
- Interface Relays
- Go to the subcategory
- Cores and Other Inductive Components
- Heatsinks, Varistors, Thermal Protection
- Fans
- Air Conditioning, Accessories for Electrical Cabinets, Coolers
-
Batteries, Chargers, Buffer Power Supplies and Inverters
- Batteries, Chargers - Theoretical Description
- Modular Li-ion Battery Building Blocks, Custom Batteries, BMS
- Batteries
- Battery Chargers and Accessories
- Uninterruptible Power Supply and Buffer Power Supplies
- Inverters and Photovoltaic Equipments
- Energy storage
- Fuel cells
- Lithium-ion batteries
- Go to the subcategory
-
Automatics
- Spiralift Lifts
- Futaba Drone Parts
- Limit Switches, Microswitches
- Sensors, Transducers
-
Infrared Thermometers (Pyrometers)
- IR-TE Series - Water-proof Palm-sized Radiation Thermometer
- IR-TA Series - Handheld Type Radiation Thermometer
- IR-H Series - Handheld Type Radiation Thermometer
- IR-BA Series - High-speed Compact Radiation Thermometer
- IR-FA Series - Fiber Optic Radiation Thermometer
- IR-BZ Series - Compact Infrared Thermometers
- Go to the subcategory
- Counters, Time Relays, Panel Meters
- Industrial Protection Devices
- Light and Sound Signalling
- Thermographic Camera
- LED Displays
- Control Equipments
- Go to the subcategory
-
Cables, Litz wires, Conduits, Flexible connections
- Wires
- Cable feedthroughs and couplers
- Litz wires
- Cables for extreme applications
- Sleevings
-
Braids
- Flat Braids
- Round Braids
- Very Flexible Flat Braids
- Very Flexible Round Braids
- Cylindrical Cooper Braids
- Cylindrical Cooper Braids and Sleevings
- Flexible Earthing Connections
- PCV Insulated Copper Braids (temp. up to 85C)
- Flat Aluminium Braids
- Junction Set - Braids and Tubes
- Steel Braids
- Go to the subcategory
- Traction Equipment
- Cable Terminals
- Flexible Insulated Busbars
- Flexible Multilayer Busbars
- Cable Duct Systems
- Go to the subcategory
- View all categories
-
Semiconductors
-
-
How to Safely Connect POWERSAFE (POWERLOCK) Connectors
 Connectors")
Practical Guide - How to Safely Connect POWERSAFE (POWERLOCK) Connectors
Do you want to know how to safely connect POWERSAFE (POWERLOCK) connectors? In this article, we’ll explain how to properly connect cables to the Powersafe Sequential Mating Box power distribution unit.
Step 1: Open the grounding cover
Using the key (included in the set), turn the grounding lock clockwise. The grounding cover will open automatically.
Step 2: Connect the grounding cable
Lift the grounding cover fully open. Take the end of the grounding cable connector (not included in the set) and insert it into the grounding socket.
Step 3: Connecting the connectors
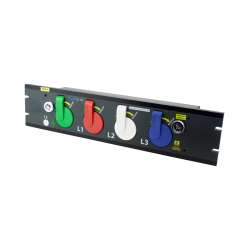
To connect the connectors, align the arrow on the connector with the green circle on the front panel of the Powersafe unit. Insert the connector fully into the box, then turn it clockwise. The neutral cover will open automatically.
Step 4: Connect the remaining connectors
Lift the neutral cover fully open and repeat steps 2–4 for the remaining connectors (E, N, L1, L2, and L3) until all are connected. Remember that POWERSAFE connectors are mechanically keyed to prevent connection errors. It is not possible to insert any connector other than the grounding connector into the corresponding port. When the covers are lifted, the previous connection cannot be disconnected without first closing the cover — for example, when the neutral cover is lifted, the grounding connector cannot be removed.
Step 5: Locking the L3 connector
When the L3 connector is fully inserted and locked, use the key and turn the L3 connector lock clockwise. This action locks the L3 connector and prevents accidental disconnection under load and further access to the unit.
How to disconnect POWERSAFE (POWERLOCK) connectors from the power distribution box
To disconnect the cables from the unit, follow the connection steps in reverse order.
Step 1: Unlock the L3 connector
Turn the L3 connector locking key counterclockwise to unlock the L3 connector.
Step 2: Disconnect the L3 connector
Next, unlock and disconnect the L3 connector by turning it counterclockwise and pulling it out of the port.
Step 3: Disconnect the remaining connectors
Once the L3 connector is disconnected, you can continue disconnecting the remaining connectors. Turn the L2 connector counterclockwise and disconnect it. Note that the L3 connector cover will automatically close during this step.
Step 4: Lock the grounding cover
After disconnecting all connectors, turn the grounding lock key counterclockwise again. This will lock the grounding cover, preventing access to the unit.
Product features of POWERSAFE (POWERLOCK) distribution boxes
Phase 3 distribution boxes are characterized by many useful features:
- Current up to 800A. They ensure a high level of quality and support a maximum current of 800A.
- M12 connectors: Universal M12 connections make the distribution units versatile and compatible with various systems.
- Remote control system: Each unit has the option of connecting remote control, increasing ease of use.
- Key locking system: Provides safety by allowing access only to authorized personnel.
Summary
Connecting POWERSAFE (POWERLOCK) connectors can be easy and safe thanks to our guide. Remember to open the covers according to the instructions and connect the cables following the appropriate steps. Thanks to the unique features of POWERSAFE distribution boxes, such as handling up to 800A current and the option of remote control, you can be sure that your connections are not only convenient but also safe. Trust branded distribution boxes from Phase 3 Connectors and connect according to the rules to ensure stability and reliability of your system.
Also read:
5 Best Methods for Installing POWERSAFE (POWERLOCK) Connectors
Related products


Related posts
Now available – DC/DC converters from PREMIUM
We introduced a novelty to our permanent offer in DACPOL in the category of power supplies and converters and today...
Read more
New release in DACPOL lighting for lathes – Kira covers
We introduce a new product into the DACPOL category of industrial lighting and today we offer KIRA covers for...
Read more
Leave a comment